- Home
- Christian Crafts
- Cardmaking
- Easter Card
Happy Easter Card
A Different Kind Of Easter Greetings - Handmade Using Rubber Stamps And Die-cuts
This Easter Card is made using die-cuts and rubber stamps from various companies.
The Easter greeting is from Hero Arts and the girl with a bouquet of flowers and the butterflies are from the Swedish company called Magnolia Rubberstamps.
And the cross is created by die-cutting and joining two different die-cuts from the Spellbinders' Parisian Motifs set of dies.
The roses are made using Sizzix 3-D flowers.

Making This Happy Easter Card
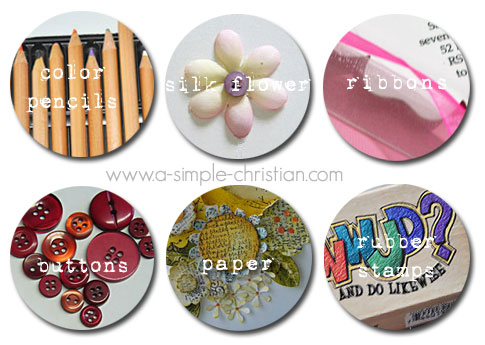
Card Making Tools and Supplies
- 12" x 6" burgundy color cardstock
- 3.5" x 6" tan color cardstock
- 5" x 4" orange color cardstock
- 12" x 12" cream colour cardstock
- Happy Easter - greeting clear stamp from HeroArts
- Girl with Bouquet of Flowers - rubber stamp by Magnolia Rubberstamps
- Butterflies - rubber stamp by Magnolia Rubberstamps
- Die-cut Machine - I used Big Shot by Sizzix
- die - Flowers 3-D
- Spellbinders Shapeabilities - Parisian Motifs
- Spellbinders Nestabilities - Labels Twenty-One
- Spellbinders Shapeabilities - Grommet Tags
- Prismacolor pencils
- Versa Magic chalk inkpad - Spanish Olive
- Memento inkpad - Tuxedo Black
- Tim Holtz Distress Ink - tattered rose
- Tim Holtz Distress Ink - weathered wood
- Organza fabric strip - gold
- Double-sided foam tape
- Toothpick
- Glue
- Trimmer
Card Making Instructions:
- Score and fold burgundy colour cardstock to make a 6"x6" square folded card.
- Ink girl with bouquet of flowers rubber stamp with Memento black ink and stamp on the cream colour card.
- Colour with Prismacolor pencils and trim closely around image.
- Ink butterfly rubber stamp with black ink and stamp two times on cream colour cardstock.
- Colour with Prismacolor pencils and trim closely around the butterfly images.
- Die cut 3-D flowers with cream colour cardstock - big (1 piece) and small (3 pieces)
- Use dauber to colour the die-cut flowers with Jim Holtz Distress Ink - tattered rose.
- Use a toothpick to roll the flowers to make the roses.
- Die-cut grommet tag with cream colour card and stencil centre of the tag with Versa Magic chalk - Spanish Olive.
- Ink Happy Easter stamp with black ink and stamp on the centre of the tag.
- Trim tag around the rectangle centre.
- Die-cut Parisian Motifs with cream colour cardstock.
- Use dauber with the Versa Magic chalk inkpad - Spanish Olive to stencil centre of motifs.
- Join the two motifs to create a cross.
- Die-cut Spellbinders Nestabilities - Label Twenty-One with orange colour cardstock.
- Dab edges with Distress Ink - weathered wood.
- Do the same for the tan colour card.
- Attach tan colour card to burgundy card with glue - 2 inches from left of burgundy card.
- Place orange die-cut on the bottom of the card front.
- Arrange girl with bouquet butterflies, Easter Card greetings, roses, and cross on card.
- Attach with glue or double-sided foam tape. (refer to photo above for placement)
- Tie a ribbon with the organza fabric strip and glue to bottom of the cross.
That's all! Though this Easter Card might take a longer time to make but I'm sure that you will be very happy with the result.
I think I spent more time looking for the right tools and supplies than actually making this easter card.
You could also hand-draw running stitches around the card. I wanted to machine-stitch it but was too lazy to go set up my sewing machine.
Christ Is Risen
wordsby Fanny Crosby
Chorus:
Christ is risen! Hallelujah!
Gladness fills the world today;
From the tomb that could not hold Him,
See, the stone is rolled away!
Click here to view the whole hymn lyrics.
You might like these
Decorating Holy Communion Sleeves To Bless Members
We love decorating holy communion sleeves with a bible verse or two and include an image to bless church members on Sunday.
Notable Good Christian Crafts - Uplifting Hobbies
These notable good Christian crafts are meaningful and enjoyable pastimes for adults and kids. Uplifting and great for building relationship too.
Card Making Supplies for Christian Cardmaking
Basic card making supplies you need to start this christian craft. Some are unique but most can be found in the home.

Help Me Spread the Word!

If you like and are blessed by the articles in A Simple Christian and believe that others can benefit from them, then please help me share this website with your friends. Just click on the share buttons below to tell your fans and friends. Thank you for sharing the good things in life. God richly bless you with His manifold blessings:-)
About

Hello!
My name is Flora Grace Tan.
I’m a crafter, web publisher and above all, a simple Christian practicing letting go and embracing God moment by moment.
Motto in life: None but Christ!
Daily Declaration: I am the Righteousness of God in Christ.
My Other Websites
News from A Simple Christian
You are not alone!
Sign up for my e-newsletter and be encouraged.
Recent Articles
-
Decorating Holy Communion Sleeves To Bless Members
Feb 29, 24 01:32 AM
 We love decorating holy communion sleeves with a bible verse or two and include an image to bless church members on Sunday.
 -
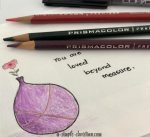
Deeply Loved In Christ!
Feb 18, 22 05:05 AM
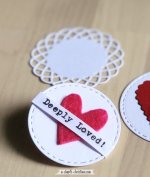 We are deeply loved by the One who is in full control of all things and events in the world. Be secured in this great love.
 -
To Abide In Christ - What Does It Means? What are the Benefits?
Feb 18, 22 05:00 AM
 To abide in Christ means trusting and resting on Jesus' finished work on the cross. It is the only place where a Christian can stay secured at all times.
New! Comments
Let me know what you think about what you just read. Leave me a comment in the box below.